If you have been following the Acton sew-along, you will know that we're now onto making pattern alterations! The bodice of the Acton is quite fitted, so making some alterations to get the bodice just right for you, is really important (if the pattern doesn't fit you straight out of the packet).
I know a lot of people get quite daunted about pattern alterations, but the ones required for the Acton aren't too scary at all, as it doesn't have sleeves or shoulder seams - which simplifies it quite a bit. I showed you how to make a toile a few days ago, and now from doing a fitting, you should know what changes you need to make. Lengthening or shortening the bodice is a common adjustment to make, so I thought I'd show you how to add length in two different spots. By referring to your toile, you should be able to tell where you need to add length - it could be from below the bust line, above the bust line, or even a bit from both.
Getting started
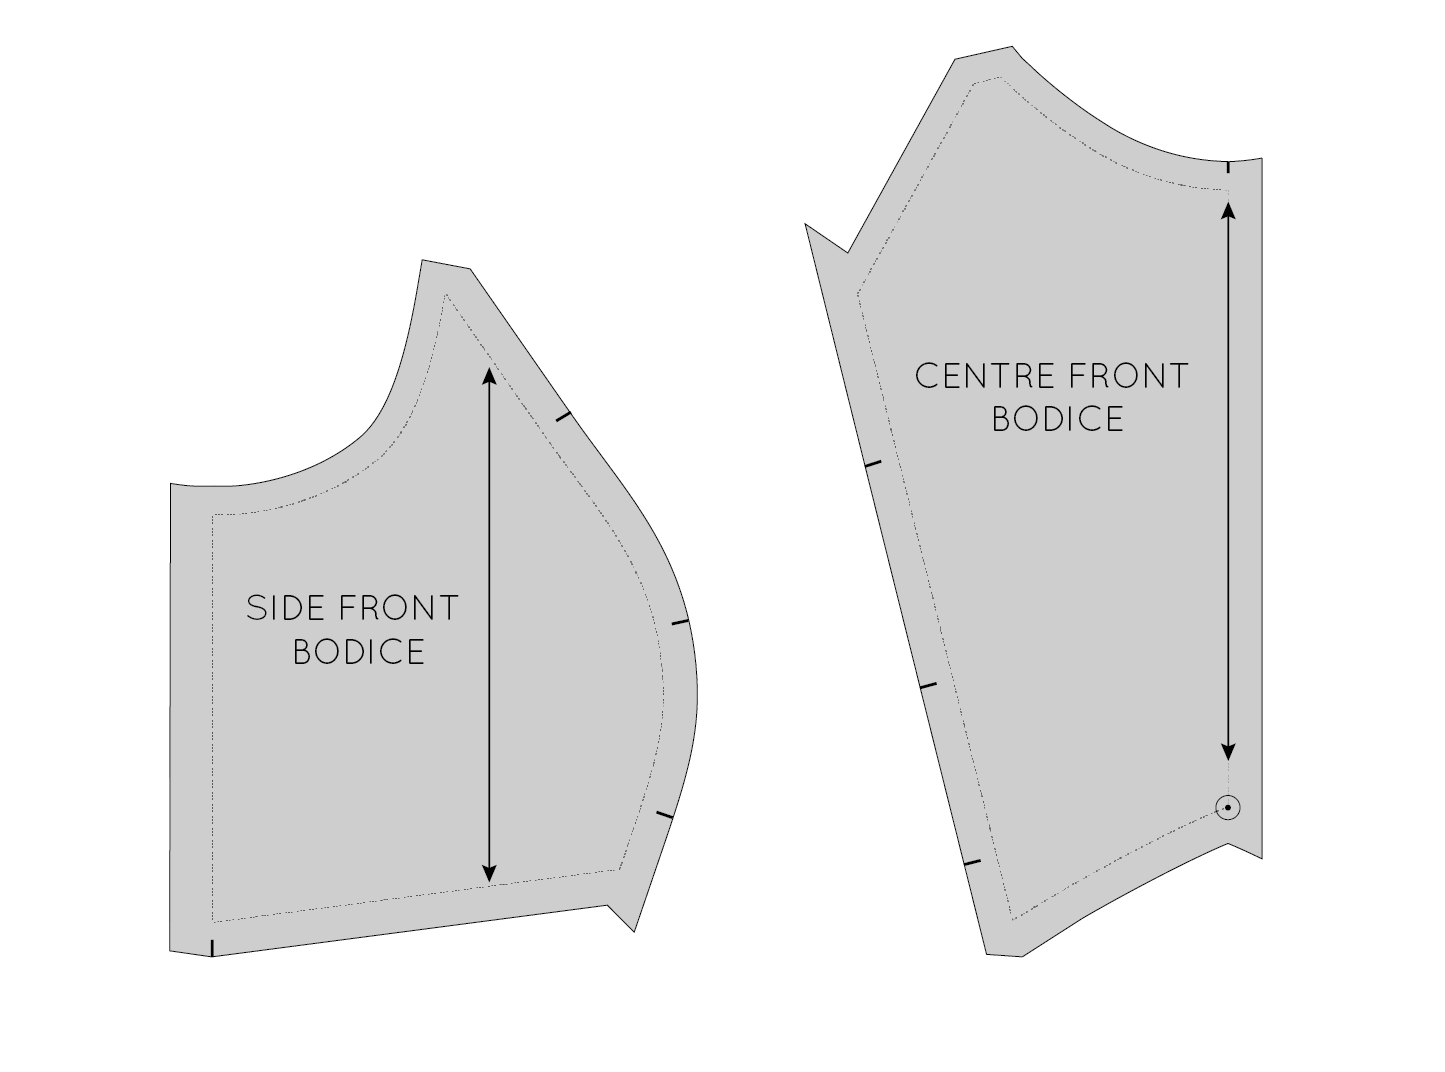
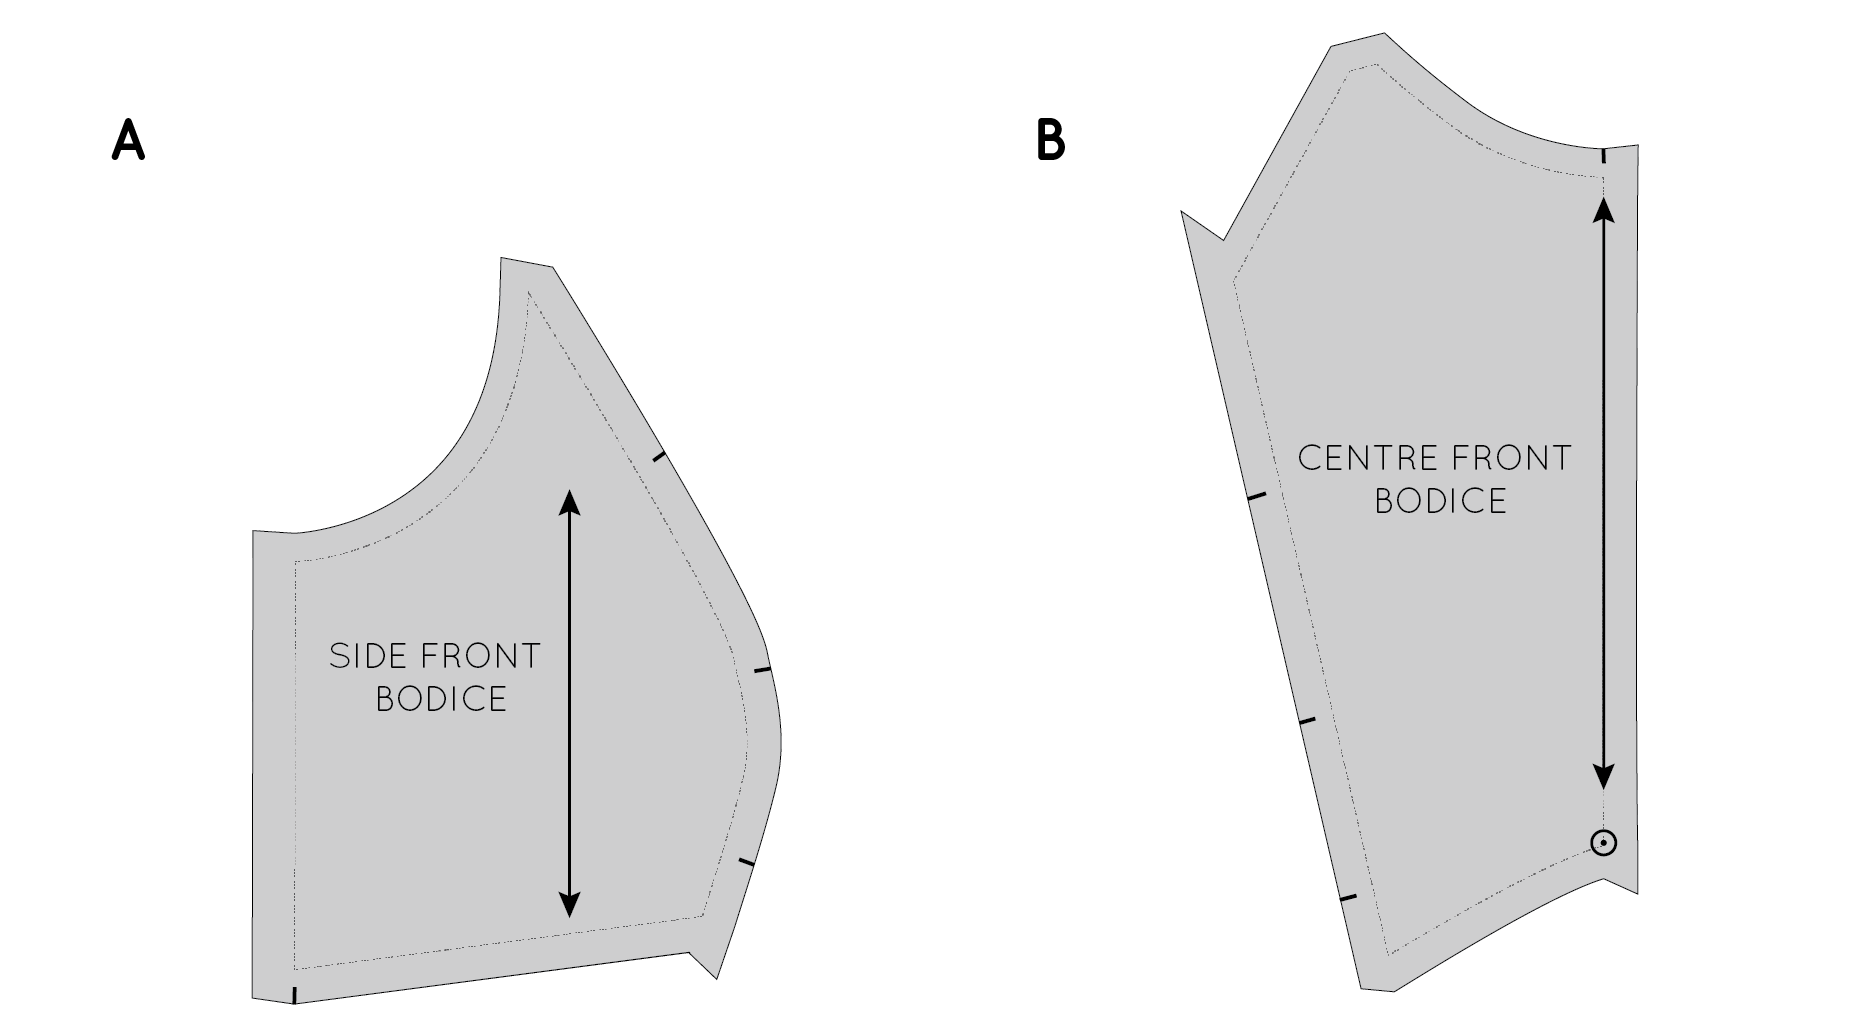
To start, trace a copy of the CENTRE FRONT BODICE and SIDE FRONT BODIE of the Acton pattern (it's always a good idea to trace a copy of the pattern, rather than using the original, in case you make a mistake. Although with a digital pattern you can always print another copy if necessary!), including all pattern markings (in this case the stitch line, grainlines and notches).
Normally I suggest removing the seam allowance when making pattern alterations, but when it's as simple as this alteration, there really is no need.
Draw a horizontal line (perpendicular to the grainline) through each pattern piece the location you need to add length. On the SIDE FRONT BODICE piece, extend the grainline so that it crosses the horizontal line and is on the top part of the pattern piece. As I said, for this tutorial I will be showing you how to add length above the bust line. If you need to add length below the bust line, check out this tutorial.
Cut through the pattern pieces
Carefully cut through each line, separating each piece into two.
lengthen the bodice
Take two pieces of pattern paper (this is a great time to use up some of your paper scraps!).
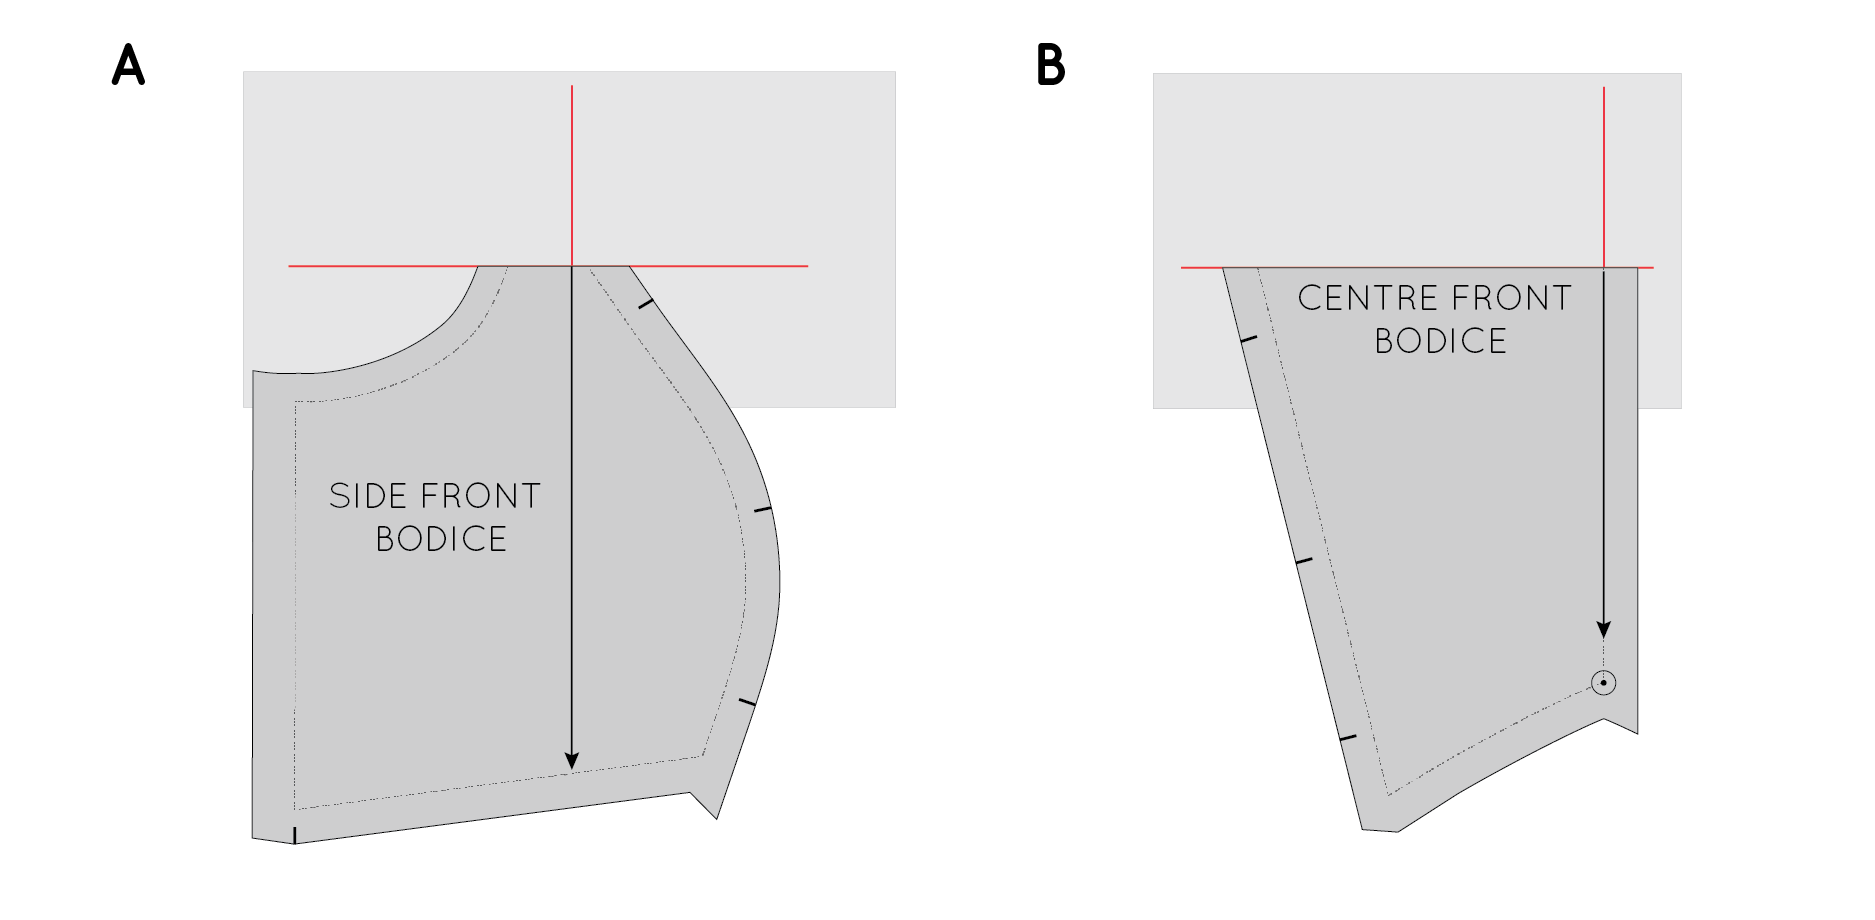
A : For the SIDE FRONT BODICE you will need your piece of paper to be slightly wider than the one for CENTRE FRONT BODICE. Draw a horizontal line straight through the (roughly) middle. In the centre, draw a line perpendicular to the horizontal line, creating a right angle. This will be the grainline of the new SIDE FRONT BODICE piece.
B : Draw a horizontal line straight through the (roughly) middle. On the right hand side, draw a line perpendicular to the horizontal line, creating a right angle. This will be the grainline of the new CENTRE FRONT BODICE piece.
A : Take the lower section of the SIDE FRONT BODICE and line it up with the horizontal and vertical line you just drew - the grainline matching up with the vertical line (you can now see why this line had to be closer to the middle) and the cut edge aligned with the horizontal line. Tape or glue in place.
B : Take the lower section of the CENTRE FRONT BODICE and line it up with the horizontal and vertical line you just drew - the centre front matching up with the vertical line and the cut edge aligned with the horizontal line. Tape or glue in place.
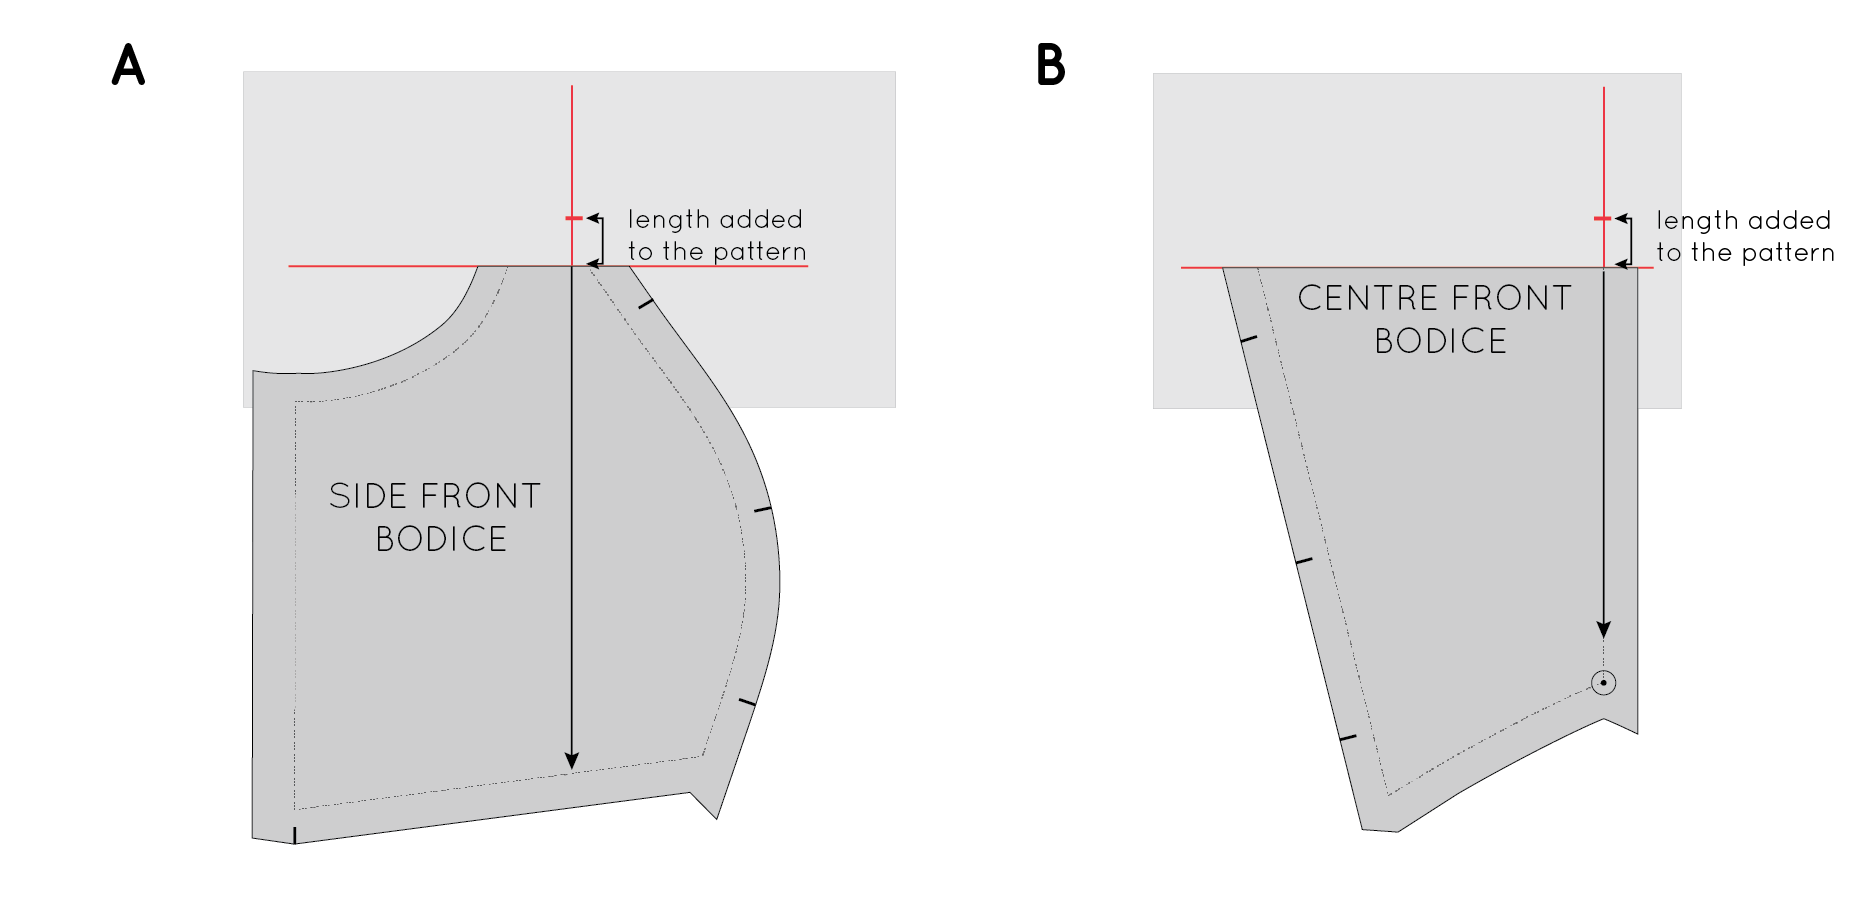
By looking at your toile, work out how much extra length you need to add to the pattern. For the case of the example, I will be adding 1.5cm (5/8").
On the vertical line on each pattern piece, mark a point 1.5cm /5/8" (or whatever length you are adding to the pattern) above the cut edge.
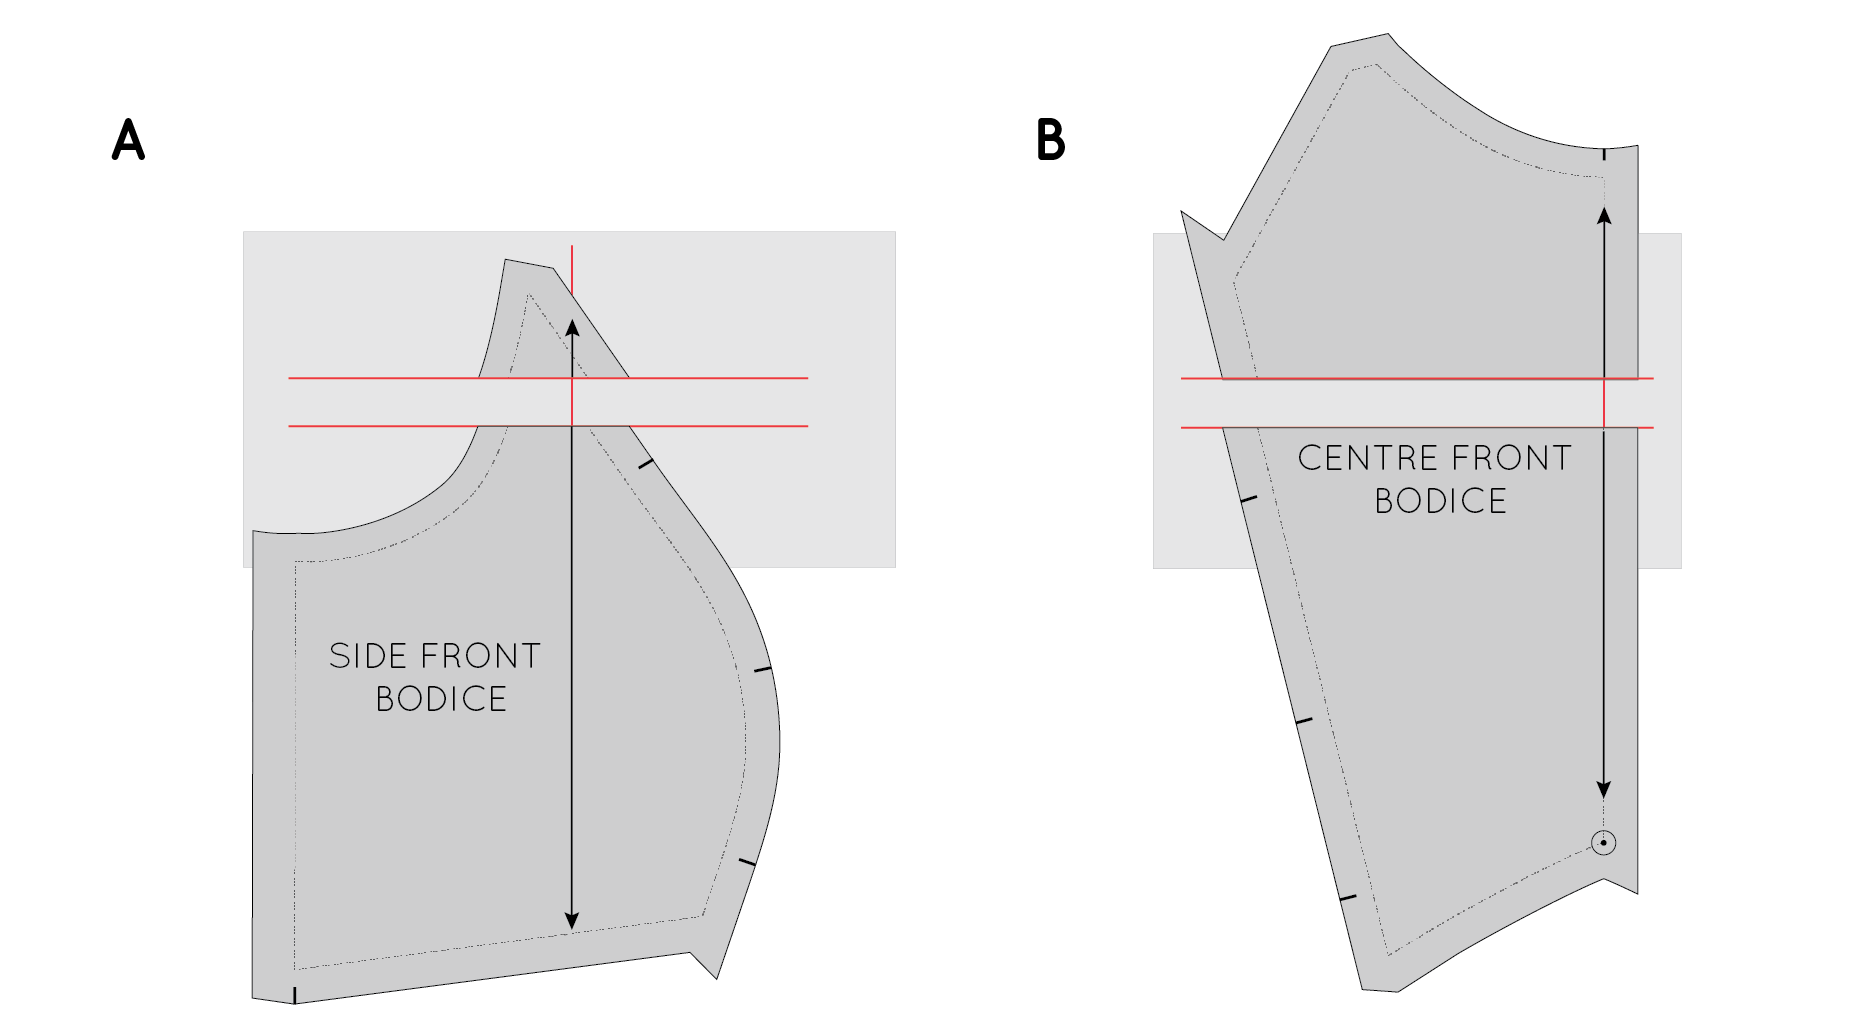
Draw a line parallel to the cut edge of the pattern running from the point you marked in the previous step on both the SIDE FRONT BODICE (A) and CENTRE FRONT BODICE (B).
A : Take the upper section of the SIDE FRONT BODICE and place the cut edge on the second horizontal line, aligning the grainline with the vertical line. Tape or glue in place.
B : Take the upper section of the CENTRE FRONT BODICE and place the cut edge on the second horizontal line, aligning the centre front with the vertical line. Tape or glue in place.
Trace the pattern pieces to create the new pieces
Take two pieces of pattern paper to trace the new pattern pieces.
A : Trace the stitch lines on the SIDE FRONT BODICE. Re-draw the armhole line and princess seam line, by finding a line of best fit between the original stitch lines.
B : Trace the stitch lines on the CENTRE FRONT BODICE. Re-draw the princess seam line by joining the top of seam to the bottom with a straight line.
Add seam allowance to both pieces - by using the original pattern edges as a guide.
A : Add 1.5cm (5/8") to the side seam, 1.2cm (1/2") to the waist seam and princess seam and 1cm (3/8") to the armhole.
B : Add 1.2cm (1/2") seam allowance to the waist seam, princess seam and centre front. Add 1cm (3/8") to the armhole and neckline.
Be sure to also transfer all pattern markings - notches, drill hole and grainline.
Label the pattern for safe-keeping. You can now cut out your new pattern pieces. Repeat process for the back pattern pieces (if you also need to add length to the back of the bodice).


